
| 일 | 월 | 화 | 수 | 목 | 금 | 토 |
|---|---|---|---|---|---|---|
| 1 | 2 | 3 | ||||
| 4 | 5 | 6 | 7 | 8 | 9 | 10 |
| 11 | 12 | 13 | 14 | 15 | 16 | 17 |
| 18 | 19 | 20 | 21 | 22 | 23 | 24 |
| 25 | 26 | 27 | 28 | 29 | 30 | 31 |
- 프로그래머스
- 개발
- Trino
- hadoop
- Kafka
- 알고리즘
- Apache Kafka
- bigdata engineering
- Linux
- 삼성역맛집
- pyspark
- apache iceberg
- 코딩
- Data Engineering
- BigData
- 코엑스맛집
- HIVE
- java
- 자바
- Spark
- 코딩테스트
- bigdata engineer
- 맛집
- Data Engineer
- 코테
- 여행
- HDFS
- 영어
- Iceberg
- 백준
- Today
- Total
지구정복
[Linux] 02/09 | 리눅스(재설치부터 DB연결까지 복습, 윈도우 데이터베이스 덤프시키기, 윈도우 자바프로젝트 리눅스로 옮기기) 본문
[Linux] 02/09 | 리눅스(재설치부터 DB연결까지 복습, 윈도우 데이터베이스 덤프시키기, 윈도우 자바프로젝트 리눅스로 옮기기)
noohhee 2021. 2. 9. 16:15복습 및 배울내용
리눅스 첫 세팅부터 다시하기
1.
2.
3. 지역/날짜 설정
	아시아/서울
4. Root암호
5. 사용자 생성
	master
-update
1. 인터넷연결
2. update
3. selinux 설정

vi /etc/selinux/config
SELINUX=permissive

-설치
1. jdk
[root@localhost ~]# yum -y install java-1.8.0-openjdk-devel
[root@localhost ~]# java -version
[root@localhost ~]# javac -version

2. vsftp
방화벽
[root@localhost ~]# vi /usr/lib/firewalld/services/ftp.xml

<?xml version="1.0" encoding="utf-8"?>
<service>
  <short>FTP</short>
  <description>FTP is a protocol used for remote file transfer. If you plan to make your FTP server publicly available, enable this option. You need the vsftpd package installed for this option to be useful.</description>
  <port protocol="tcp" port="21"/>
  <port protocol="tcp" port="22"/>
  <helper name="ftp"/>
</service>
:wq

[root@localhost ~]# firewall-cmd --zone=public --add-service=ftp --permanent
[root@localhost ~]# firewall-cmd --reload
[root@localhost ~]# yum -y install vsftpd
[root@localhost ~]# systemctl start vsftpd
[root@localhost ~]# systemctl enable vsftpd
[root@localhost ~]# ifconfig
192.168.86.129
윈도우 파일질라에서 연결


3. mariadb
[root@localhost ~]# cd /usr/lib/firewalld/services/
[root@localhost services]# cp mysql.xml mariadb.xml
[root@localhost services]# vi mariadb.xml

<?xml version="1.0" encoding="utf-8"?>
<service>
  <short>MariaDB</short>
  <description>MariaDB Database Server</description>
  <port protocol="tcp" port="3306"/>
</service>

[root@localhost services]# firewall-cmd --zone=public --add-service=mariadb --permanent
[root@localhost services]# firewall-cmd --reload

[root@localhost services]# yum -y install mariadb
[root@localhost services]# yum -y install mariadb-server

	한글설정
/etc/my.cnf.d/client.cnf
/etc/my.cnf.d/mysql-client.cnf
/etc/my.cnf.d/mariadb-server.cnf
[root@localhost ~]# vi /etc/my.cnf.d/client.cnf
#
# These two groups are read by the client library
# Use it for options that affect all clients, but not the server
#

[client]
default-character-set=utf8
# This group is not read by mysql client library,
# If you use the same .cnf file for MySQL and MariaDB,
# use it for MariaDB-only client options
[client-mariadb]

[root@localhost ~]# vi /etc/my.cnf.d/mysql-client.cnf
#
# These groups are read by MariaDB command-line tools
# Use it for options that affect only one utility
#

[mysql]
default-character-set=utf8
[mysql_upgrade]

[mysqladmin]

[mysqlbinlog]

[mysqlcheck]

[mysqldump]
default-character-set=utf8
[mysqlimport]

[mysqlshow]

[mysqlslap]

[root@localhost ~]# vi /etc/my.cnf.d/mariadb-server.cnf

# These groups are read by MariaDB server.
# Use it for options that only the server (but not clients) should see
#
# See the examples of server my.cnf files in /usr/share/mysql/
#

# this is read by the standalone daemon and embedded servers
[server]

# this is only for the mysqld standalone daemon
# Settings user and group are ignored when systemd is used.
# If you need to run mysqld under a different user or group,
# customize your systemd unit file for mysqld/mariadb according to the
# instructions in http://fedoraproject.org/wiki/Systemd
[mysqld]
datadir=/var/lib/mysql
socket=/var/lib/mysql/mysql.sock
log-error=/var/log/mariadb/mariadb.log
pid-file=/run/mariadb/mariadb.pid

collation-server=utf8_general_ci
init-connect='SET NAMES utf8'
character-set-server=utf8

[root@localhost ~]# systemctl start mariadb
[root@localhost ~]# mysql
MariaDB [(none)]> show variables like 'c%';
MariaDB [(none)]> exit
[root@localhost ~]# systemctl enable mariadb
[root@localhost ~]# reboot

[master@localhost ~]$ mysql -u root -p
Enter password: (비밀번호 없음 바로 엔터)

[master@localhost ~]$ mysqladmin -u root password '!123456'
[master@localhost ~]$ mysql -u root -p
Enter password: !123456

MariaDB [(none)]> create database project;
MariaDB [(none)]> use project;
MariaDB [project]> create table testtbl(col varchar(20));
MariaDB [project]> insert into testtbl values('aaa');
MariaDB [project]> insert into testtbl values('ㅇㅇㅇ');
MariaDB [project]> select * from testtbl;
+-----------+
| col       |
+-----------+
| aaa       |
| ㅇㅇㅇ    |
+-----------+
2 rows in set (0.000 sec)

MariaDB [project]> drop table testtbl;

-root 외부원격접속 허용시키기
MariaDB [project]> grant all privileges on *.* to 'root'@'%' identified by '!123456';
MariaDB [project]> flush privileges;


4. tomcat
-방화벽 설정
[master@localhost ~]$ su - root
암호:
[root@localhost ~]# cd /usr/lib/firewalld//services/
[root@localhost services]# cp http.xml tomcat.xml
[root@localhost services]# vi tomcat.xml

<?xml version="1.0" encoding="utf-8"?>
<service>
  <short>WAS (HTTP)</short>
  <description>Apache Tomcat</description>
  <port protocol="tcp" port="8080"/>
</service>

[root@localhost services]# firewall-cmd --zone=public --add-service=tomcat --permanent
[root@localhost services]# firewall-cmd --reload
[root@localhost services]# exit

-설치
[master@localhost ~]$ wget https://downloads.apache.org/tomcat/tomcat-9/v9.0.43/bin/apache-tomcat-9.0.43.tar.gz
[master@localhost ~]$ tar xvf apache-tomcat-9.0.43.tar.gz

-톰캣실행
[master@localhost ~]$ ./apache-tomcat-9.0.43/bin/startup.sh
또는
[master@localhost ~]$ ./apache-tomcat-9.0.43/bin/catalina.sh run
[master@localhost ~]$ ./apache-tomcat-9.0.43/bin/stutdown.sh
1. 리눅스
1. 윈도우 데이터베이스 데이터를 리눅스 데이터베이스로 옮기기(덤프)
[master@localhost ~]$ su - root
암호:
[root@localhost ~]# systemctl start mariadb
[root@localhost ~]# mysql -u root -p
Enter password:
MariaDB [(none)]> exit

#새로운 터미널 창을 켜서 덤프받는다.
[master@localhost ~]$ mysqldump -h 192.168.219.103 -u project -p123456 project -P 3307 | mysql -u project -p123456 project
실습) 윈도우 마리아디비 sample 데이터베이스 안에 있는 zipcode테이블을 리눅스 project 데이터베이스 안에 옮겨보자(마이그레이션)
mysqldump -h 192.168.219.103 -P 3307 -u root -p'!123456' sample zipcode | mysql -u root -p'!123456' project
2. 윈도우에서 만든 스프링게시판 리눅스로 옮기기
* 게시판 배포 순서
기존 톰캣중지
라이브러리 옮기기
	jar
	class
설정파일
이미지 / css
jsp
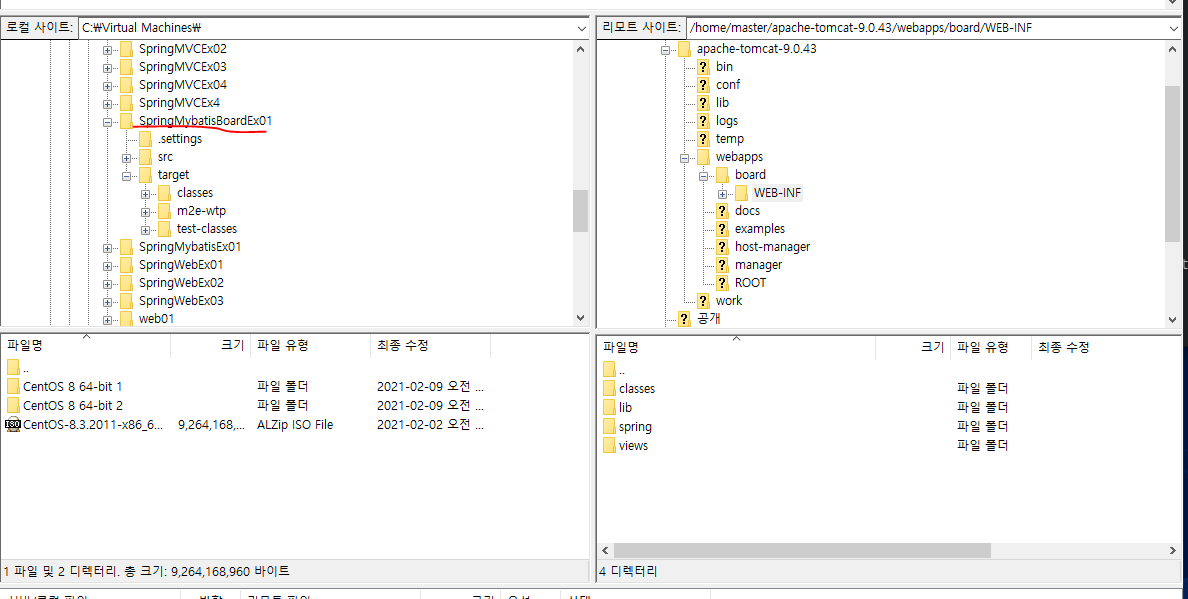
윈도우 이클립스의 기존에 사용한 SpringMybatisBoardEx01 프로젝트를 리눅스 데이터베이스와 연동해서
실행이 되는지 확인한다.
root-context.xml 리눅스 데이터베이스 설정을 적어준다.
<?xml version="1.0" encoding="UTF-8"?>
<beans xmlns="http://www.springframework.org/schema/beans"
	xmlns:xsi="http://www.w3.org/2001/XMLSchema-instance"
	xsi:schemaLocation="http://www.springframework.org/schema/beans https://www.springframework.org/schema/beans/spring-beans.xsd">

	<!-- Root Context: defines shared resources visible to all other web components -->
	<bean id="dataSource" class="org.springframework.jdbc.datasource.DriverManagerDataSource">
		<property name="driverClassName" value="org.mariadb.jdbc.Driver" />
		<property name="url" value="jdbc:mysql://192.168.86.129:3306/project" />
		<property name="username" value="root" />
		<property name="password" value="!123456" />
	</bean>

	<bean id="sqlSessionFactory" class="org.mybatis.spring.SqlSessionFactoryBean">
		<property name="dataSource" ref="dataSource" />
		<property name="mapperLocations" value="classpath:mappers/mapper1.xml" />
	</bean>

	<bean id="sqlSession" class="org.mybatis.spring.SqlSessionTemplate">
		<constructor-arg ref="sqlSessionFactory" />
	</bean>
</beans>
실행이 되는 것을 확인할 수 있다.
파일질라를 먼저 킨다.
아래처럼 디렉터리를 만들어준다.
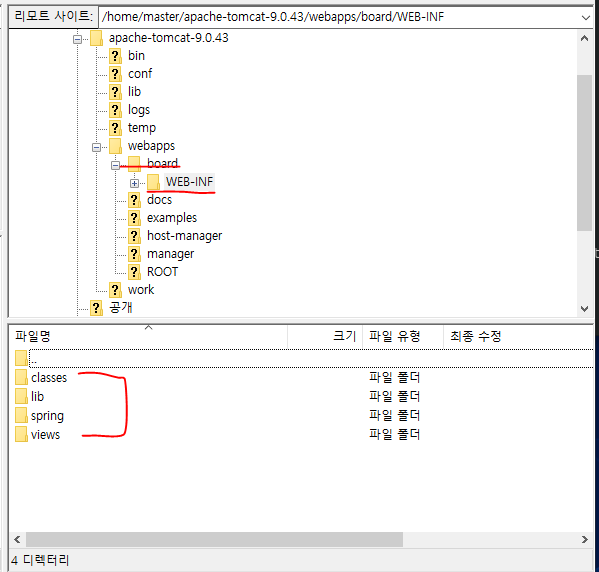
webapp
	board
		WEB-INF
			classes	class
				mapper
				log4j.xml

		lib		library

		spring		spring설정파일

		views		jsp파일

		web.xml
그리고 윈도우쪽에서 아래 프로젝트에서 하나씩 옮겨줘야한다.
이때 라이브러리는 해당 프로젝트에 존재하지 않고 이클립스가 통합관리한다.
아래 라이브러리를 다운받고 리눅스서버 lib폴더에 넣어준다.
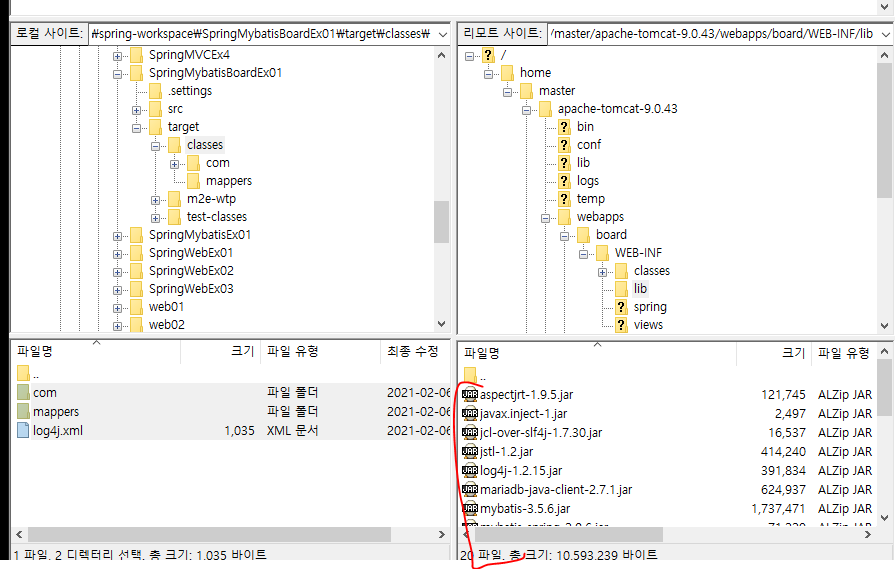
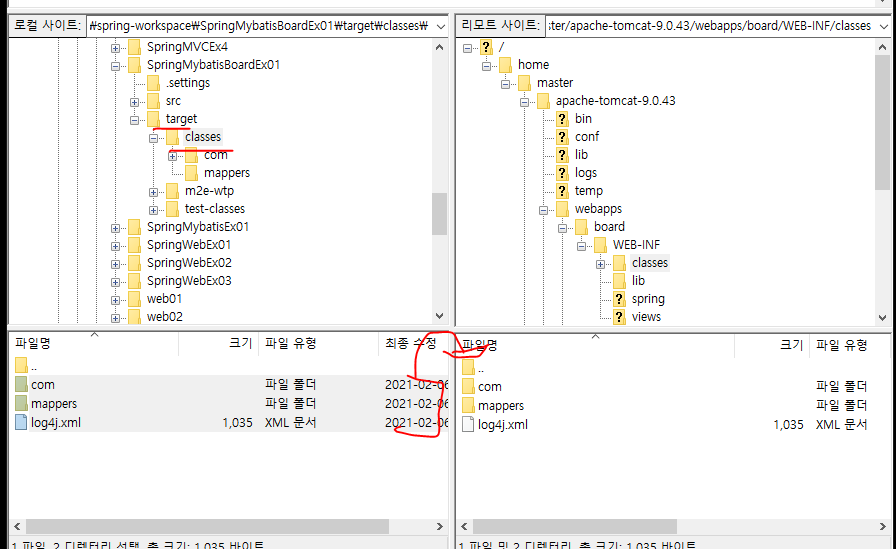
classes 폴더에 target의 classes안에 com, mapper, log4j.xml을 옮겨준다.
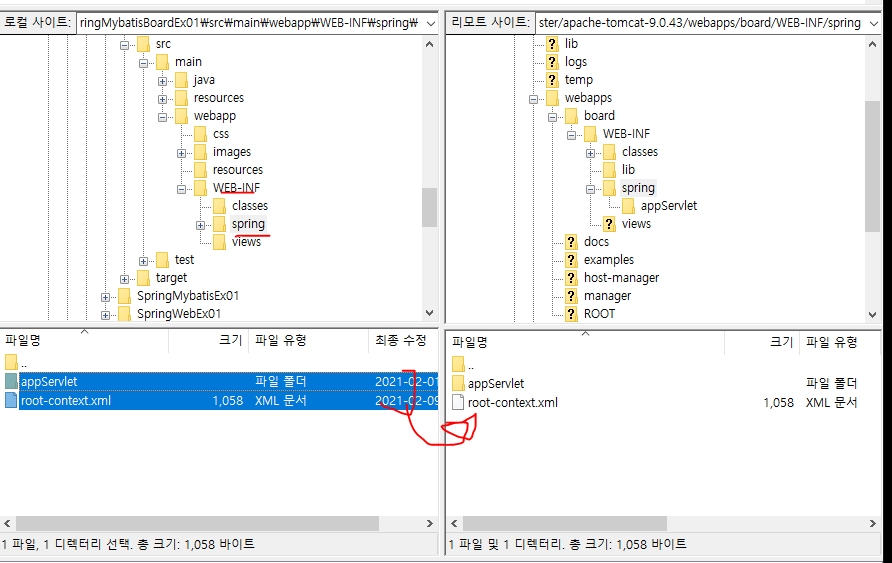
다음 spring폴더에 아래처럼 옮겨준다.

다음으로 web.xml을 옮겨준다.

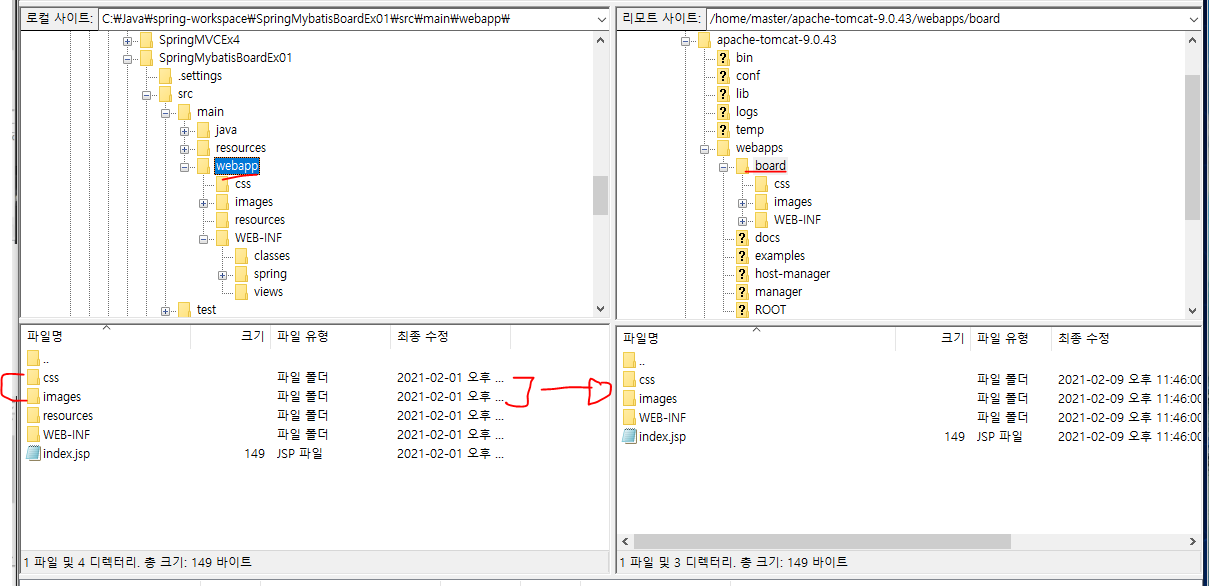
이미지파일과 css를 옮겨준다. index.jsp까지 옮겨준다.
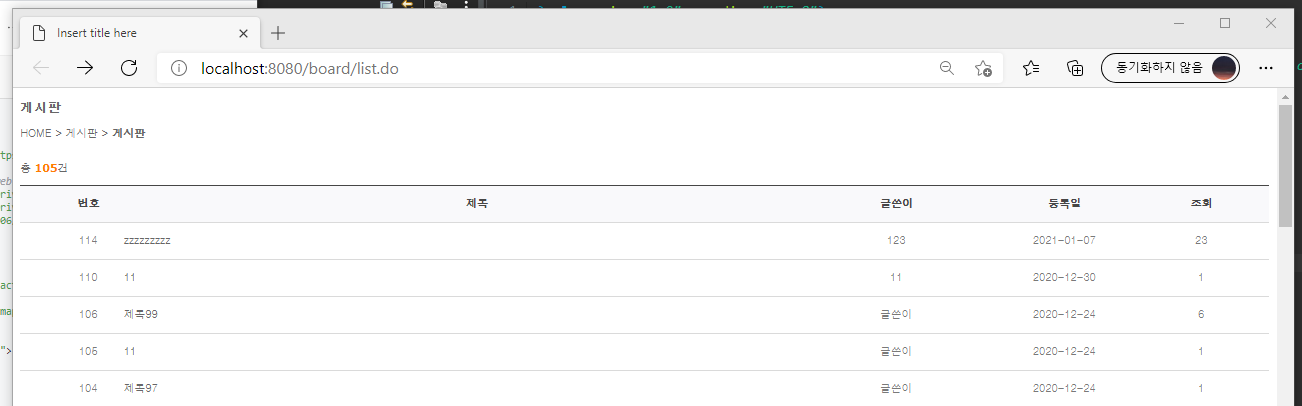
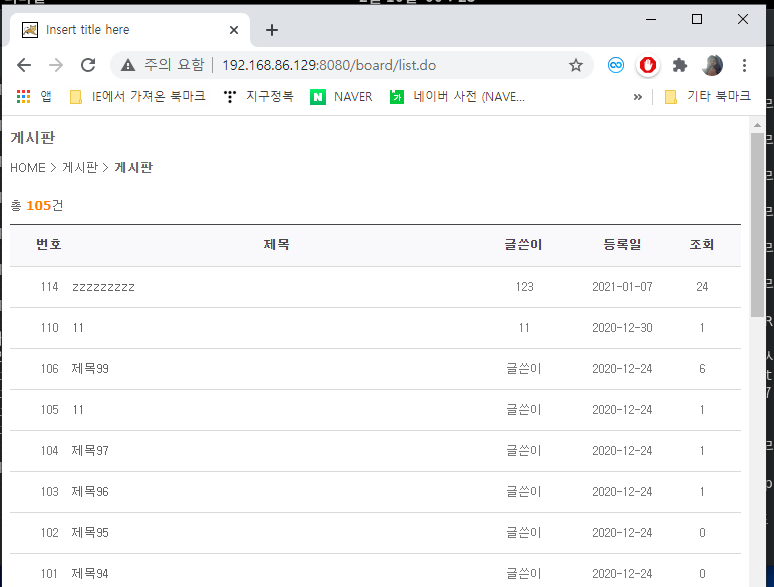
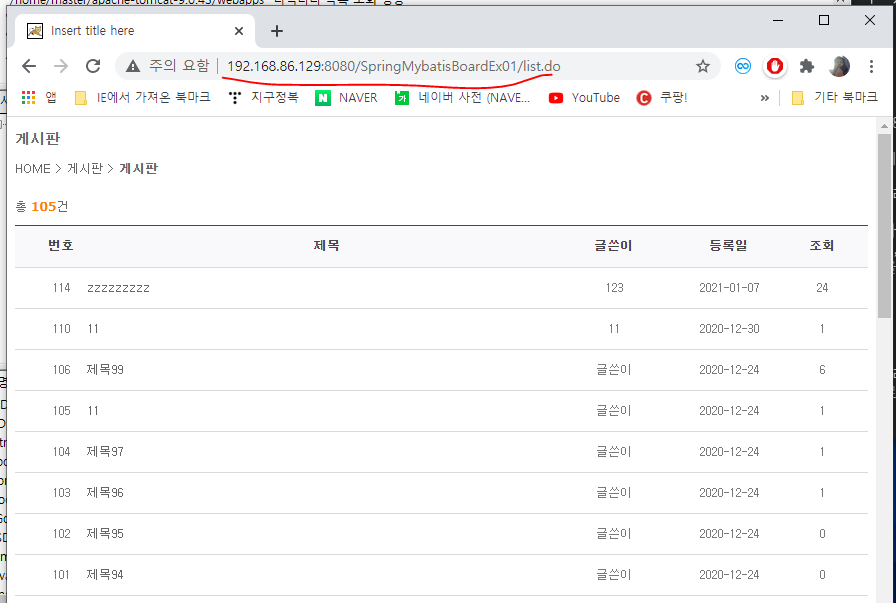
그리고 리눅스에서 톰캣서버 키고 아래처럼 윈도우 브라우저에서 아래 주소를 쳐보면
게시판이 실행되는 것을 알 수 있다.
이번에는 윈도우 이클립스에서 war파일로 리눅스에 집어넣고 실행시켜보자.
먼저 SpringMybatisBoardEx01프로젝트를 war파일로 export한다.
그리고 리눅스서버에서 톰캣이 켜져있는 상태로
파일질라 리눅스 서버에서 webapp에 해당 war파일을 집어넣는다.

그러면 톰캣에서 아래처럼 새로운 프로젝트를 배치한다고 로그창이 나온다.

그리고 파일질라 webapp을 새로고침하면 아래처럼 war파일이 디렉터리로 풀려있는 것을 확인할 수 있다.

그리고 다시 윈도우 웹브라우저에서 아래처럼 주소를 치면 게시판이 실행된다.
'데이터 엔지니어링 정복 > Linux' 카테고리의 다른 글
| [Linux] CentOS 7 yum 에러 해결 (1) | 2021.12.07 |
|---|---|
| [Linux] CentOS 6 버전 yum update시 에러 해결 (0) | 2021.05.05 |
| [Linux] 02/08 | 리눅스( apache-tomcat 재설치, FTP서버 사용하기, 리눅스에 데이터베이스 설치 및 사용(MariaDB), 우편번호검색기, 게시판 ) (0) | 2021.02.08 |
| [Linux] 02/05 | RAID 개념, 리눅스서버사용(아파치톰캣 사용, 포트번호변경, 윈도우 브라우저에서 접속하기) (0) | 2021.02.05 |
| [Linux] 02/04 | 리눅스 명령어(압축관련, 이클립스 사용, RPM 사용, YUM 사용, 저장공간, 서버관리) (0) | 2021.02.04 |

