
| 일 | 월 | 화 | 수 | 목 | 금 | 토 |
|---|---|---|---|---|---|---|
| 1 | 2 | 3 | 4 | 5 | 6 | 7 |
| 8 | 9 | 10 | 11 | 12 | 13 | 14 |
| 15 | 16 | 17 | 18 | 19 | 20 | 21 |
| 22 | 23 | 24 | 25 | 26 | 27 | 28 |
- hadoop
- 개발
- 코엑스맛집
- Spark
- bigdata engineer
- 자바
- apache iceberg
- Linux
- 알고리즘
- Apache Kafka
- 코딩테스트
- 영어
- Data Engineering
- 코딩
- HIVE
- bigdata engineering
- 프로그래머스
- 코테
- pyspark
- Data Engineer
- Iceberg
- Kafka
- BigData
- java
- 여행
- 삼성역맛집
- 백준
- HDFS
- Trino
- 맛집
- Today
- Total
지구정복
[Python] 3/15 | SQLite3 사용(create, insert, select, 우편번호검색기), 파이썬과 인터넷(urllib, json, htmlparser) 본문
[Python] 3/15 | SQLite3 사용(create, insert, select, 우편번호검색기), 파이썬과 인터넷(urllib, json, htmlparser)
noohhee 2021. 3. 15. 12:131. 파이썬을 이용하여 데이터베이스 조작
1. sqlite3 사용
sqlite3 모듈은 파이썬 표준 라이브러리로 SQLite에 대한 인터페이스를 제공한다. 이를 이용하면 따로 데이터베이스 모듈을 사용하지 않고 쉽게 이용할 수 있다.
sqlite3.connect( 파일 경로 ) 의 뜻은 파일경로에 데이터베이스를 생성한다는 의미이다.
test라는 데이터베이스를 만들고 phonebook이란 테이블을 만들어보자.
import sqlite3

conn = sqlite3.connect( 'test.db' )

cursor = conn.cursor()
cursor.execute( 'create table phonebook( name text, phonenum text )' )
cursor.execute( "insert into phonebook values ( 'derick', '010-1112-1111' ) " )
cursor.close()
conn.commit()
print( '데이터베이스에 데이터 입력 성공' )

print( conn )
conn.close()

또한 sqlite3를 사용하면 각 데이터베이스의 타입을 자동으로 변환해준다.
예를 들면 int, integer, tinyint, smallint mediumint 등등이 자동으로 integer로 변환된다.
sqlite brower 사용
Downloads - DB Browser for SQLite
(Please consider sponsoring us on Patreon 😄) Windows Our latest release (3.12.1) for Windows: Windows PortableApp There is a PortableApp available, but it’s still the previous (3.12.0) release version. It should be updated to 3.12.1 over the next few
sqlitebrowser.org
아래 파일을 다운받는다.
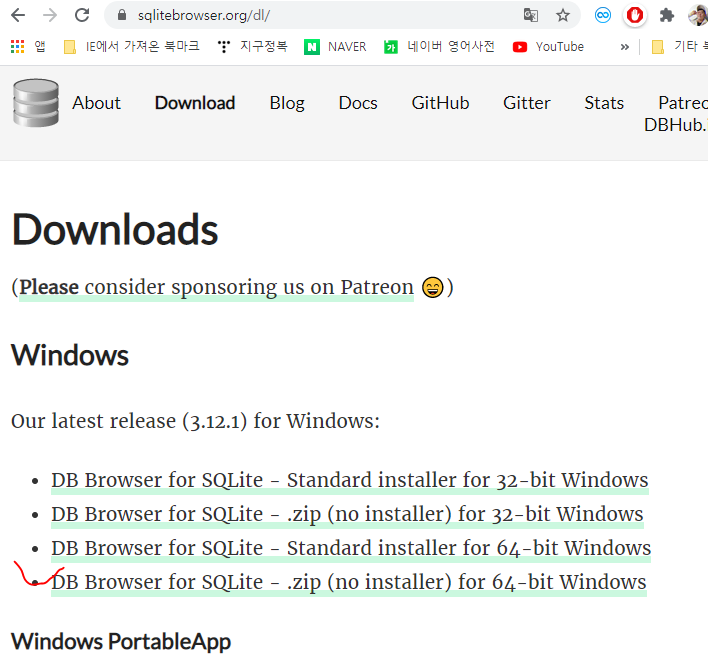
아무데서나 압축을 풀고 아래 실행파일을 실행.

파일 -> 데이터베이스 열기 -> 위에서 만든 test.db 불러오기
아까 만든 테이블을 확인할 수 있다.

변수를 이용해서 insert하기
import sqlite3

conn = sqlite3.connect( 'test.db' )

cursor = conn.cursor()
#cursor.execute( "insert into phonebook values ( 'derick', '010-1112-1111' ) " )

name = 'SangJung'
phonenumber = '010-2222-2222';

sql_insert = 'insert into phonebook values ( ?, ? )'
sql_data = ( name, phonenumber )

cursor.execute( sql_insert, sql_data )

conn.commit()
cursor.close()

print( '데이터베이스에 데이터 입력 성공' )

conn.close()
두 개 이상의 데이터를 동시에 insert할 때
cursor.executemany() 를 이용한다.
import sqlite3

conn = sqlite3.connect( 'test.db' )

cursor = conn.cursor()

sql_insert = 'insert into phonebook values ( ?, ? );'
datalist = ( ('tom', '010-1231-1424'), ('james', '103-1231-5356') )

cursor.executemany( sql_insert, datalist )

conn.commit()
cursor.close()

print( '데이터베이스에 데이터 입력 성공' )

conn.close()
select문 사용
import sqlite3

conn = sqlite3.connect( 'test.db' )

cursor = conn.cursor()

cursor.execute("select * from phonebook;")
for row in cursor:
    print( row )

cursor.close()
conn.close()


('SangJung', '010-2222-2222')
('tom', '010-1231-1424')
('james', '103-1231-5356')
select문에서 몇 개의 레코드만 조회하기
fechone() 메서드는 1개의 레코드를 조회하고 fechmany()는 이미 조회된 1개의 레코드를 제외한 다음 레코드부터 반환한다. 또한 조회된 전체 결과 집합보다 큰 값이 인자로 입력되면 조회된 결과를 모두 반환한다.
import sqlite3

conn = sqlite3.connect( 'test.db' )

cursor = conn.cursor()

cursor.execute("select * from phonebook;")

print( cursor.fetchone() )
print( cursor.fetchmany(2) )    #이미 조회된 레코드 다음부터 2개의 레코드만 출력하기
print( cursor.fetchmany(8) )    #남은 레코드들 모두 출력


cursor.close()
conn.close()


('SangJung', '010-2222-2222')
[('tom', '010-1231-1424'), ('james', '103-1231-5356')]
[('bones', '010-1231-1424'), ('gatner', '103-1231-5356')]
실습) 우편번호 데이터를 데이터베이스에 넣고 우편번호 검색기를 만들기
import sqlite3

conn = sqlite3.connect( 'zipcode.db' )
cursor = conn.cursor()

cursor = conn.execute( 'create table zipcode (zipcode text, sido text, gugun text, dong text, ri text, bunji text, seq text);')

sql_insert = 'insert into zipcode values ( ?, ?, ?, ?, ?, ?, ? );'

f = open( './zipcode_all_utf8_type2.csv', 'r', encoding='utf-8' )

datalist = ()
result = 0
for row in f.readlines():
    addresses = row.split( ',' )
    addresses = tuple( addresses )
    cursor.execute( sql_insert, addresses )
    result += 1

print( '실행결과 : ', result )

conn.commit()

cursor.close()
conn.close()


실행결과 :  52144

2. 파이썬과 네트워크
1. urllib 사용하기
url에 대한 정보 출력하기
from urllib.parse import urlparse

#url 분석하기
url = urlparse( 'https://search.naver.com/search.naver?where=nexearch&sm=top_hty&fbm=1&ie=utf8&query=%EC%BD%94%EB%A1%9C%EB%82%98' )
print( url )
print( url.scheme )
print( url.path )
print( url.query )


ParseResult(scheme='https', netloc='search.naver.com', path='/search.naver', params='', query='where=nexearch&sm=top_hty&fbm=1&ie=utf8&query=%EC%BD%94%EB%A1%9C%EB%82%98', fragment='')
https
/search.naver
where=nexearch&sm=top_hty&fbm=1&ie=utf8&query=%EC%BD%94%EB%A1%9C%EB%82%98
urparse이용해서 url정보를 결합하기
from urllib.parse import urlunparse

url = urlunparse( ( 'https', 'www.daum.net', 'hello', 'params', 'a=b', 'flog' ) )
print( url )


https://www.daum.net/hello;params?a=b#flog
한글 인코딩해서 url 쿼리형식으로 만들기
from urllib.parse import urlencode

form = { 'name': '홍길동', 'phone': '010-1231-1231' }
encform = urlencode( form )

# 한글이 인코딩되면서 url쿼리형태로 변환돼서 출력된다.
print( encform )


name=%ED%99%8D%EA%B8%B8%EB%8F%99&phone=010-1231-1231
urlopen을 이용해서 해당 웹페이지 객체 불러오기
from urllib.request import urlopen

urldata = urlopen( 'https://m.daum.net' )
print( urldata )
print( '헤더정보: ', urldata.headers )

#디코딩해야지 읽을 수 있다.
html = urldata.read().decode( 'utf-8' )
print( 'html 내용: ', html )

Request와 urlopen을 이용해서 웹페이지 읽기
from urllib.request import Request, urlopen

url = 'https://www.daum.net'
req = Request( url )
urldata = urlopen( req )

html = urldata.read()
print( html.decode( 'utf-8' ) )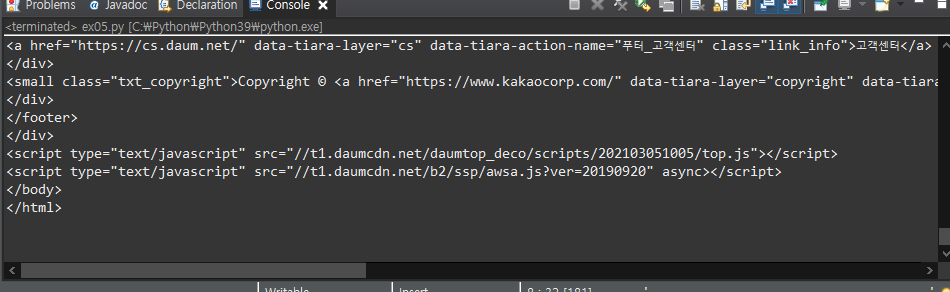
2. 데이터 처리기법( JSON )
먼저 json형태로 문자열을 만들고 json.loads()를 이용해서 json형태로만든다. 그러면 파이썬의 dict타입으로 변환되는 것을 확인할 수 있다.
import json

#json처리하는 모듈 출력
print( dir(json) )

#현재 문자열
str1 = '{ "name":"홍길동", "birth":"0530", "age":"30" }'

#json형태의 문자열은 기본적으로 dict형태로 바뀐다.
json1 = json.loads( str1 )
print( type( json1 ) )
print( json1 )

#데이터에 접근할 때는 dict에 접근하는 것과 같다.
print( json1['name'] )


str2 = '{ "name":"홍길동", "birth": [ "10", "20", "30", "40" ], "age":"30" }'
json2 = json.loads( str2 )
print( json2['birth'][0] )


['JSONDecodeError', 'JSONDecoder', 'JSONEncoder', '__all__', '__author__', '__builtins__', '__cached__', '__doc__', '__file__', '__loader__', '__name__', '__package__', '__path__', '__spec__', '__version__', '_default_decoder', '_default_encoder', 'codecs', 'decoder', 'detect_encoding', 'dump', 'dumps', 'encoder', 'load', 'loads', 'scanner']
<class 'dict'>
{'name': '홍길동', 'birth': '0530', 'age': '30'}
홍길동
10
json파일을 불러와서 데이터 불러오기
json형태의 txt파일을 만든다.
-json.txt
{
	"name":"홍길동",
	"birth":"0530",
	"age":"30"
}
-json02.py (실행파일)
import json

with open( './json.txt', encoding='utf-8' ) as f:
    data = json.load( f )
    print( data )


{'name': '홍길동', 'birth': '0530', 'age': '30'}
3. htmlparser로 html분석하기
from html.parser import HTMLParser

class MyHTMLParser( HTMLParser ):
    def handle_starttag(self, tag, attrs):
        print( 'start_tag :', tag )

    def handle_endtag(self, tag ):
        print( 'end_tag :', tag )

    #내용출력하는 메소드
    def handle_data(self, data):
        print( 'data : ', data )

html = '''
<html>
<head>
<title>Test</title>
</head>
<body>
<h1>Parse me !</h1>
</body>
</html>
'''

#시작태그 또는 끝태그가 나올 때마다 해당태그가 출력된다.
parser = MyHTMLParser()
parser.feed( html )

#시작태그 확인하기
print( parser.get_starttag_text() )


data :

start_tag : html
data :

start_tag : head
data :

start_tag : title
data :  Test
end_tag : title
data :

end_tag : head
data :

start_tag : body
data :

start_tag : h1
data :  Parse me !
end_tag : h1
data :

end_tag : body
data :

end_tag : html
data :

<h1>
원하는 데이터만 읽기
h1태그를 찾으면 h1태그의 데이터값을 출력해보자.
from html.parser import HTMLParser

class MyHTMLParser( HTMLParser ):
    flag = 0
    def handle_starttag(self, tag, attrs ):
        if tag == 'h1':
            self.flag = 1

    def handle_endtag(self, tag ):
        if tag == 'h1':
            self.flag = 0

    #내용출력하는 메소드
    def handle_data(self, data):
        if self.flag == 1:
            print( 'data : ', data )

html = '''
<html>
<head>
<title>Test</title>
</head>
<body>
<h1>Parse me !</h1>
</body>
</html>
'''

#시작태그 또는 끝태그가 나올 때마다 해당태그가 출력된다.
parser = MyHTMLParser()
parser.feed( html )


data :  Parse me !


