
- 지구정복과정 (531)

- 데이터 엔지니어링 정복 (429)
- Elastic Stack (2)
- Hadoop Ecosystem (27)
- HTML-CSS-JavaScript-Spring-.. (43)
- JAVA & JSP (46)
- Python (29)
- SQL (14)
- Cloud(AWS, Ncloud) (9)
- Docker&Kubernetes (2)
- Linux (12)
- Git-GitHub (9)
- Algorithm (159)
- HDFS (6)
- Iceberg (9)
- Hive (5)
- Hue (1)
- Yarn (1)
- Spark (10)
- MapReduce (2)
- Airflow (3)
- Sqoop (2)
- Tez (0)
- Trino (3)
- Kafka (12)
- Zookeeper (2)
- Flume (2)
- Oozie (1)
- Hbase (3)
- Ranger (1)
- OpenSearch (1)
- Ansible & AWX (2)
- AD & LDAP (0)
- NiFi (3)
- Ambari (1)
- Infra Solr (2)
- 데이터 애널리틱스 정복 (3)
- 프로젝트 (5)
- 자격증 정복 (33)
- 영어 정복 (7)
- 건강 정복 (5)
- 주식 정복 (가능 ?) (0)
- 이것저것 (38)
- 데이터 엔지니어링 정복 (429)
| 일 | 월 | 화 | 수 | 목 | 금 | 토 |
|---|---|---|---|---|---|---|
| 1 | 2 | 3 | 4 | 5 | ||
| 6 | 7 | 8 | 9 | 10 | 11 | 12 |
| 13 | 14 | 15 | 16 | 17 | 18 | 19 |
| 20 | 21 | 22 | 23 | 24 | 25 | 26 |
| 27 | 28 | 29 | 30 | 31 |
- Apache Kafka
- 개발
- Data Engineer
- 삼성역맛집
- HIVE
- Data Engineering
- Kafka
- Linux
- 자바
- Trino
- Spark
- 코엑스맛집
- Iceberg
- 코테
- 코딩테스트
- 프로그래머스
- java
- 맛집
- pyspark
- bigdata engineer
- 영어
- hadoop
- 코딩
- BigData
- 백준
- 여행
- 알고리즘
- apache iceberg
- bigdata engineering
- 용인맛집
- Today
- Total
지구정복
[Maven&Spring] 1/22 | Maven(myBatis사용), Spring(개념 및 특징, 이클립스에서 설치방법, 수동 라이브러리 추가, Maven으로 라이브러리 추가, DI사용하기, 실습) 본문
[Maven&Spring] 1/22 | Maven(myBatis사용), Spring(개념 및 특징, 이클립스에서 설치방법, 수동 라이브러리 추가, Maven으로 라이브러리 추가, DI사용하기, 실습)
noohhee 2021. 1. 22. 17:20복습 및 배울내용
Maven -> 프로젝트만들때
	Java - Java Project
	JSP - Dynamic Web Project
	-> 라이브러리를 수동으로 관리한다.

	Maven Project(Ant -> Maven -> Gradle 순으로 발전)
	maven.apache.org 사이트 참고
	gradle은 gradle.org 사이트 참고
	-> 라이브러리를 자동으로 관리한다.
		-> pom.xml 에서
	-> 복잡한 조건 컴파일(빌드: bulid)자동관리
1. Maven
1. myBatis로 DB연동해서 데이터 조회하기
새로운 Maven 프로젝트를 만들고 pom.xml에 mariaDB, mybatis, log4j 라이브러리를 추가한다.
<project xmlns="http://maven.apache.org/POM/4.0.0"
	xmlns:xsi="http://www.w3.org/2001/XMLSchema-instance"
	xsi:schemaLocation="http://maven.apache.org/POM/4.0.0 http://maven.apache.org/xsd/maven-4.0.0.xsd">
	<modelVersion>4.0.0</modelVersion>

	<groupId>com.exam</groupId>
	<artifactId>ex01</artifactId>
	<version>0.0.1-SNAPSHOT</version>
	<packaging>jar</packaging>

	<name>ex01</name>
	<url>http://maven.apache.org</url>

	<properties>
		<project.build.sourceEncoding>UTF-8</project.build.sourceEncoding>
	</properties>

	<!-- 외부라이브러리 넣는 곳  -->
	<dependencies>
		<dependency>
			<groupId>junit</groupId>
			<artifactId>junit</artifactId>
			<version>3.8.1</version>
			<scope>test</scope>
		</dependency>

		<!-- mariaDB 라이브러리 추가  -->
		<!-- https://mvnrepository.com/artifact/org.mariadb.jdbc/mariadb-java-client -->
		<dependency>
		    <groupId>org.mariadb.jdbc</groupId>
		    <artifactId>mariadb-java-client</artifactId>
		    <version>2.7.1</version>
		</dependency>

		<!-- myBatis 라이브러리  -->
		<!-- https://mvnrepository.com/artifact/org.mybatis/mybatis -->
		<dependency>
		    <groupId>org.mybatis</groupId>
		    <artifactId>mybatis</artifactId>
		    <version>3.5.6</version>
		</dependency>

		<!-- https://mvnrepository.com/artifact/log4j/log4j -->
		<dependency>
		    <groupId>log4j</groupId>
		    <artifactId>log4j</artifactId>
		    <version>1.2.17</version>
		</dependency>


	</dependencies>
</project>
src/main/java에 log4j.xml과 myBatisConfig.xml을 추가한다.
src/main/java의 App.java에서 myBatis로 DB연동해서 사용해보자.
-App2.java
package com.exam.ex01;

import java.io.IOException;
import java.io.InputStream;
import java.sql.Connection;
import java.sql.DriverManager;
import java.sql.ResultSet;
import java.sql.SQLException;
import java.sql.Statement;

import org.apache.ibatis.io.Resources;
import org.apache.ibatis.session.SqlSession;
import org.apache.ibatis.session.SqlSessionFactory;
import org.apache.ibatis.session.SqlSessionFactoryBuilder;

/**
 * Hello world!
 *
 */
public class App2 {
    public static void main( String[] args ) {

    	String resource = "myBatisConfig.xml";
    	InputStream is = null;
    	SqlSession sqlSession = null;

    	try {
			is = Resources.getResourceAsStream( resource );
			SqlSessionFactory sqlSessionFactory = new SqlSessionFactoryBuilder().build( is );

			sqlSession = sqlSessionFactory.openSession( true );
			System.out.println( "설정 성공" );

		} catch (IOException e) {
			System.out.println( "[에러]: " + e.getMessage() );

		} finally {
			if( sqlSession != null ) sqlSession.close();
			if( is != null ) try { is.close(); } catch( IOException e ) {}
		}

    }
}

만약 myBatisConfig.xml파일을 다른 곳에 쓰려면
String resource에다가 해당 위치를 써줘야한다.
String resource = "com/exam/ex01/myBatisConfig.xml";
이번에는 myBatis를 이용해서 dept테이블을 조회해보자.
먼저 src/main/java에 model1이라는 새로운 패키지를 만들어준다.
그리고 model1 패키지 안에 DeptTO.java와 mapping역할을 하는 dept.xml을 만들어준다.

-DeptTO.java
package com.exam.model1;

public class DeptTO {
	private String deptno;
	private String dname;
	private String loc;
	public String getDeptno() {
		return deptno;
	}
	public String getDname() {
		return dname;
	}
	public String getLoc() {
		return loc;
	}
	public void setDeptno(String deptno) {
		this.deptno = deptno;
	}
	public void setDname(String dname) {
		this.dname = dname;
	}
	public void setLoc(String loc) {
		this.loc = loc;
	}
}
-dept.xml
<?xml version="1.0" encoding="UTF-8" ?>
<!DOCTYPE mapper PUBLIC "-//mybatis.org//DTD Mapper 3.0//EN" "http://mybatis.org/dtd/mybatis-3-mapper.dtd">
<mapper namespace="mybatis">
	<!-- list  -->
	<select id="select1" resultType="com.exam.model1.DeptTO">
		select *
		from dept
		where deptno = #{deptno};
	</select>
</mapper>
-App3.java(실행클래스)
package com.exam.ex01;

import java.io.IOException;
import java.io.InputStream;
import java.sql.Connection;
import java.sql.DriverManager;
import java.sql.ResultSet;
import java.sql.SQLException;
import java.sql.Statement;

import org.apache.ibatis.io.Resources;
import org.apache.ibatis.session.SqlSession;
import org.apache.ibatis.session.SqlSessionFactory;
import org.apache.ibatis.session.SqlSessionFactoryBuilder;

import com.exam.model1.DeptTO;

/**
 * Hello world!
 *
 */
public class App3 {
    public static void main( String[] args ) {

    	String resource = "myBatisConfig.xml";
    	InputStream is = null;
    	SqlSession sqlSession = null;

    	try {
			is = Resources.getResourceAsStream( resource );
			SqlSessionFactory sqlSessionFactory = new SqlSessionFactoryBuilder().build( is );

			sqlSession = sqlSessionFactory.openSession( true );
			System.out.println( "설정 성공" );

			DeptTO to = sqlSession.selectOne( "select1", "10" );
			System.out.print( to.getDeptno() + " / " );
			System.out.print( to.getDname() + " / " );
			System.out.println( to.getLoc() );

		} catch (IOException e) {
			System.out.println( "[에러]: " + e.getMessage() );

		} finally {
			if( sqlSession != null ) sqlSession.close();
			if( is != null ) try { is.close(); } catch( IOException e ) {}
		}

    }
}
이번에는 웹프로젝트를 사용한다.
메이븐 프로젝트로 웹프로젝트를 만들어보자. 아래와 같이 만든다. webapp으로 만들어준다.

그리고 서버설정을 해줘야한다.
해당 프로젝트 오른쪽 버튼 - properties - build path - library에서 아래와 같이 설정한다.


이제 마리아디비 mybatis로 연동해서 dept테이블을 조회해보자.
-ex01.jsp
<%@ page language="java" contentType="text/html; charset=UTF-8"
    pageEncoding="UTF-8"%>
<%@ page import="java.sql.Connection" %>
<%@ page import="java.sql.PreparedStatement" %>
<%@ page import="java.sql.ResultSet" %>
<%@ page import="java.sql.SQLException" %>
<%@ page import="java.sql.DriverManager" %>

<!DOCTYPE html>
<html>
<head>
<meta charset="UTF-8">
<title>Insert title here</title>
</head>
<body>
<%
	String url = "jdbc:mysql://localhost:3307/sample";
	String user = "root";
	String password = "!123456";

	Connection conn = null;
	PreparedStatement pstmt = null;
	ResultSet rs = null;
	StringBuffer html = new StringBuffer();

	try {
		Class.forName("org.mariadb.jdbc.Driver");
		conn = DriverManager.getConnection(url, user, password);

		String sql = "select * from emp";
		pstmt = conn.prepareStatement(sql);

		rs = pstmt.executeQuery();

		while( rs.next() ) {
			html.append( rs.getString( "deptno" ) + "<br>" );
		}
	} catch (ClassNotFoundException e) {
		// TODO Auto-generated catch block
		e.printStackTrace();
	} catch (SQLException e) {
		// TODO Auto-generated catch block
		e.printStackTrace();
	} finally {
		if(rs!=null) try {rs.close();} catch(SQLException e) {}
		if(conn!=null) try {conn.close();} catch(SQLException e) {}
		if(pstmt!=null) try {pstmt.close();} catch(SQLException e) {}
	}
%>

<%= html %>
</body>
</html>
2. Spring
Maven -> 프로젝트만들때
	Java - Java Project
	JSP - Dynamic Web Project
	-> 라이브러리를 수동으로 관리한다.

	Maven Project(Ant -> Maven -> Gradle 순으로 발전)
	maven.apache.org 사이트 참고
	gradle은 gradle.org 사이트 참고
	-> 라이브러리를 자동으로 관리한다.
		-> pom.xml 에서
	-> 복잡한 조건 컴파일(빌드: bulid)자동관리

Spring
	- 객체 관리용 프레임워크
	=> Spring MVC를 위해선 아래 개념을 이해해야한다.
	- IoC (Inversion of Control: 제어반전)
	- DI (Dependency Inject: 의존 주입)
	- AOP (Aspect Orientation Programming : 관점중심 프로그래밍 기법)

	spring.io

	spring 사용을 위해 이클립스의 plug-in - sts 를 추가해야한다.
1. Spring 개념 및 특징
참고사이트: jerryjerryjerry.tistory.com/62
java로 다양한 어플리케이션을 만들기위한 프로그래밍 틀이라 할 수 있다.
spring은 중복코드의 사용률을 줄여주고, 비즈니스 로직을 더 간단하게 할 수 있다.
즉, Spring이란 java를 더 쉽게 사용할 수 있게 해주는 오픈소스 프레임워크이다.
프레임워크란?
프레임워크는 자주 쓰이는 기능들을 한 곳에 모아놓은 클래스들의 집합이다.
프레임워크와 라이브러리의 차이점은?
라이브러리는 개발자가 프로그램 개발 중에 필요한 것을 직접 추가한다.
하지만 프레임워크는 필요한 라이브러리와 기능 구현에 필요한 설계도 틀을 함께 제공해준다.
특징
- IoC (Inversion of Control: 제어반전)
원래 개발자는 java코딩시 new연산자, 인터페이스 호출, 데이터 클래스 호출 방식으로 객체를 생성하고
소멸시킨다.
IoC란 객체의 생성부터 소멸까지 객체 생명주기 관리를 개발자가 아닌 스피링(컨테이너)가 대신 해주는 것을
의미한다. 이는 대규모 프로젝트에서 유용한다.
즉, 제어권이 개발자가 아닌 IoC에게 있으며 IoC가 개발자의 코드를 호출하여 그 코드로 생명주기를 제어하는 것이다.
- DI (Dependency Inject: 의존 주입)
프로그래밍에서 구성요소 간의 의존관계가 소스코드 내부가 아닌 외부의 설정파일을 통해 정의되는 방식이다.
코드 재사용을 높여서 소스코드를 다양한 곳에 사용할 수 있으며 모듈간의 결합도도 낮출 수 있다.
즉, 각각의 계층이나 서비스들 간에 의존성이 존재할 경우 프레임워크가 자동으로 서로 연결시켜준다.
- AOP (Aspect Orientation Programming : 관점중심 프로그래밍 기법)
로깅, 트랜잭션, 보안 등 여러 모듈에서 공통적으로 사용하는 기능을 분리하여 관리할 수 있다.
즉, AOP는 여러 객체에 공통으로 적용할 수 있는 기능을 구분함으로써 재사용성을 높여주는 프로그래밍 기법이다.
- POJO(Plain Old Java Object)방식
POJO는 Java EE를 사용하면서 해당 플랫폼에 종속되어 있는 무거운 객체들을 만드는 것에 반발하여 나타난
용어이다. 즉, getter/setter를 가진 단순한 자바 오브젝트이다.
2. Spring 개발을 위한 이클립스에 Plug-In 설치
먼저 워크스페이스를 새롭게 변경해준다.


Help 의 Eclipse Marketplace에서 sts 검색

3버전 install

confirm 클릭

동의하고 Finish

설치완료되면 이클립스를 껐다가 다시 킨다.
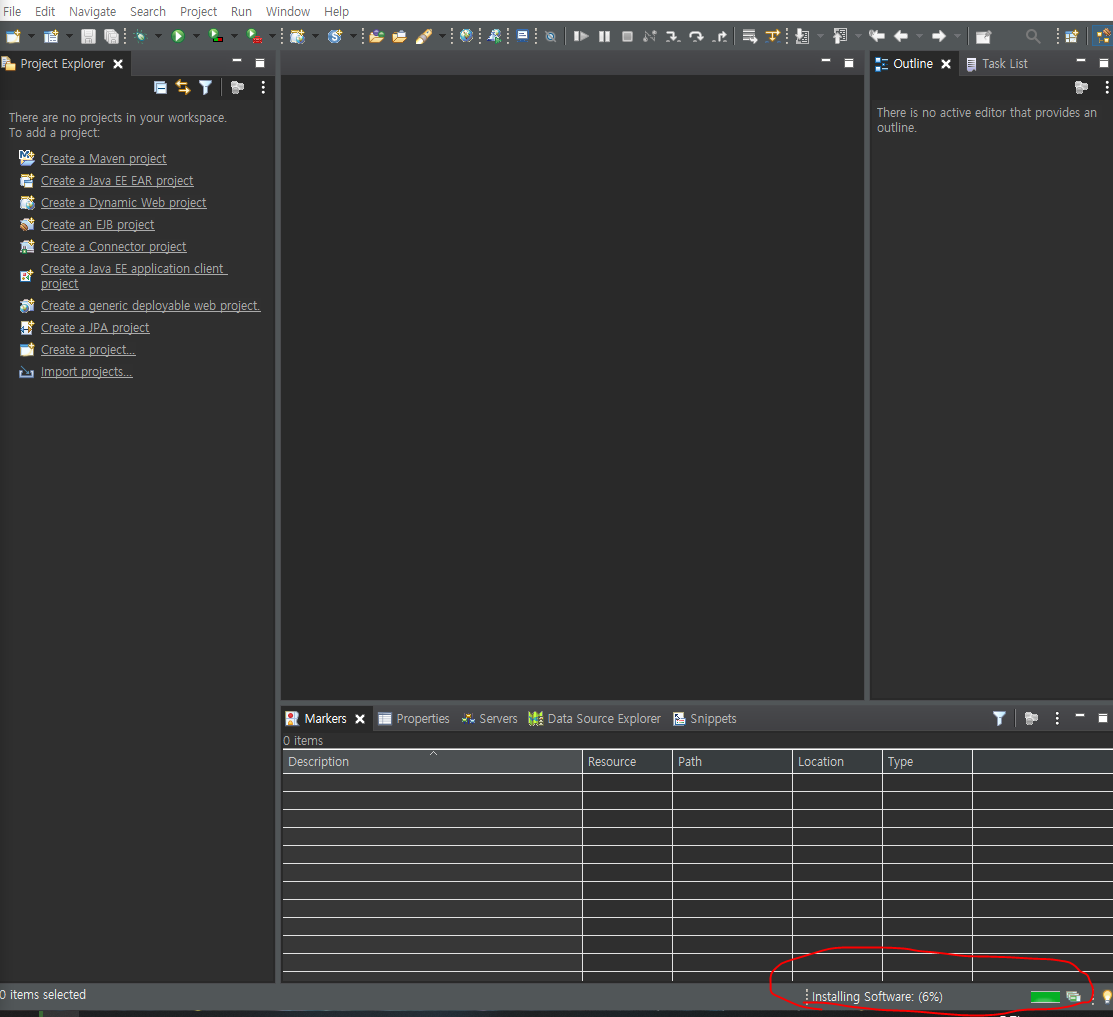

plug-in설치가 완료되었다.
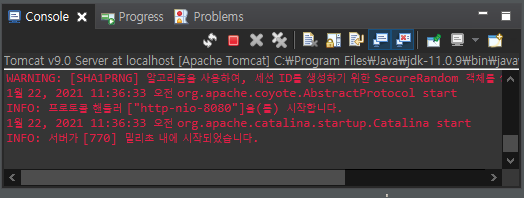
다음으로 perspective 화면을 spring으로 바꿔준다.


다음으로 서버설정을한다.


시작이 잘 되는지 start해본다.

다음으로 spring 프로젝트를 만들고 라이브러리 넣는방법이 2가지가 있다
먼저 수동으로 라이브러리를 추가해서 사용해보자.
3. Spring 사용하기
3.1. 수동으로 라이브러리 추가하고 사용하기


참고: 혹시 jre 라이브러리가 없으면 아래처럼 수동으로 설정하면된다.


이제 클래스를 만들어서 사용해보자.
메소드가 있는 클래스를 만들어준다.
-HelloBean1.java
package basic;

public class HelloBean1 {

	public void sayHello( String name ) {
		System.out.println( name + "님 안녕하세요");
	}
}
-Application.java (실행클래스)
package basic;

public class ApplicationMain {

	public static void main(String[] args) {

		//아래 new로 객체생성하는 것을 스프링에게 맡길 수 있다.
		//스프링 설정안에 저장하고 그 설정을 불러올 수 있다.
		HelloBean1 helloBean1 = new HelloBean1();
		helloBean1.sayHello( "홍길동" );

	}
}
ㅡㅡㅡㅡㅡㅡㅡㅡㅡㅡㅡㅡㅡㅡㅡㅡㅡㅡㅡㅡㅡㅡㅡㅡㅡㅡㅡㅡㅡㅡㅡㅡㅡ
홍길동님 안녕하세요
이제 위의 결과를 spring을 이용해서 다시 만들어보자.
다시 spring이란 패키지를 만들고 HelloBean1.java를 복사해오고 아래와 같이 생성자를 만들어준다.


아래와 같이 코딩한다.
-context.xml
<?xml version="1.0" encoding="UTF-8"?>
<beans xmlns="http://www.springframework.org/schema/beans"
	xmlns:xsi="http://www.w3.org/2001/XMLSchema-instance"
	xsi:schemaLocation="http://www.springframework.org/schema/beans https://www.springframework.org/schema/beans/spring-beans-4.3.xsd">

	<!-- 아래 bean태그에서 class에 적은 클래스를 helloBean1이란 이름으로 설정해준다는 뜻이다.
	이것이 의존성 주입이다.  -->
	<bean name="helloBean1" class="spring.HelloBean1" />

	<!-- ID로 설정할 수도 있다.  -->
	<bean id="helloBean2" class="spring.HelloBean1" />

</beans>
context.xml에서 bean을 만드는 순간 파일이 바뀐다.

그리고 실행클래스를 만들고 실행해보자.
-ApplicationMain.java (실행클래스)
package spring;
import org.springframework.context.ApplicationContext;
import org.springframework.context.support.ClassPathXmlApplicationContext;
public class ApplicationMain {
public static void main(String[] args) {
ApplicationContext ctx =
new ClassPathXmlApplicationContext( "classpath:spring/context.xml" );
// getBean은 context <bean>태그의 이름을 불러온다는 뜻
HelloBean1 helloBean1 = (HelloBean1)ctx.getBean( "helloBean1" );
helloBean1.sayHello( "박문수" );
HelloBean1 helloBean2 = (HelloBean1)ctx.getBean( "helloBean2" );
helloBean1.sayHello( "홍길동" );
}
}
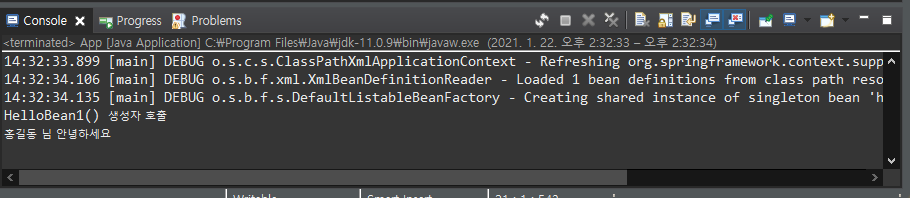
ㅡㅡㅡㅡㅡㅡㅡㅡㅡㅡㅡㅡㅡㅡㅡㅡㅡㅡㅡㅡㅡㅡㅡㅡㅡㅡㅡㅡㅡㅡㅡㅡㅡㅡㅡㅡㅡ
HelloBean1() 생성자 호출
HelloBean1() 생성자 호출
박문수님 안녕하세요
홍길동님 안녕하세요
위처럼 사용하는 것이 의존성 주입이다.
3.2. maven으로 라이브러리 추가하고 사용하기
Maven 프로젝트를 만들어보자. 그리고 아래 폼xml을 복사해간다.
-pom.xml
<project xmlns="http://maven.apache.org/POM/4.0.0" xmlns:xsi="http://www.w3.org/2001/XMLSchema-instance"
  xsi:schemaLocation="http://maven.apache.org/POM/4.0.0 http://maven.apache.org/xsd/maven-4.0.0.xsd">
	<modelVersion>4.0.0</modelVersion>

	<groupId>com.exam</groupId>
	<artifactId>spring2</artifactId>
	<version>0.0.1-SNAPSHOT</version>
	<packaging>jar</packaging>

	<name>ex01</name>
	<url>http://maven.apache.org</url>

	<properties>

		<!-- Generic properties -->
		<java.version>1.8</java.version>
		<project.build.sourceEncoding>UTF-8</project.build.sourceEncoding>
		<project.reporting.outputEncoding>UTF-8</project.reporting.outputEncoding>

		<!-- Spring -->
		<spring-framework.version>5.2.8.RELEASE</spring-framework.version>

		<!-- Hibernate / JPA -->
		<hibernate.version>4.2.1.Final</hibernate.version>

		<!-- Logging -->
		<logback.version>1.0.13</logback.version>
		<slf4j.version>1.7.5</slf4j.version>

		<!-- Test -->
		<junit.version>4.11</junit.version>
	</properties>

	<dependencies>
		<!-- Spring and Transactions -->
		<dependency>
			<groupId>org.springframework</groupId>
			<artifactId>spring-context</artifactId>
			<version>${spring-framework.version}</version>
		</dependency>
		<dependency>
			<groupId>org.springframework</groupId>
			<artifactId>spring-tx</artifactId>
			<version>${spring-framework.version}</version>
		</dependency>

		<!-- Logging with SLF4J & LogBack -->
		<dependency>
			<groupId>org.slf4j</groupId>
			<artifactId>slf4j-api</artifactId>
			<version>${slf4j.version}</version>
			<scope>compile</scope>
		</dependency>
		<dependency>
			<groupId>ch.qos.logback</groupId>
			<artifactId>logback-classic</artifactId>
			<version>${logback.version}</version>
			<scope>runtime</scope>
		</dependency>

		<!-- Hibernate -->
		<dependency>
			<groupId>org.hibernate</groupId>
			<artifactId>hibernate-entitymanager</artifactId>
			<version>${hibernate.version}</version>
		</dependency>

		<!-- Test Artifacts -->
		<dependency>
			<groupId>org.springframework</groupId>
			<artifactId>spring-test</artifactId>
			<version>${spring-framework.version}</version>
			<scope>test</scope>
		</dependency>
		<dependency>
			<groupId>junit</groupId>
			<artifactId>junit</artifactId>
			<version>${junit.version}</version>
			<scope>test</scope>
		</dependency>

	</dependencies>
</project>
만약 사용하다가 스프링 버전이 맞지않아서 낮춰야할 경우엔 아래 코드로 수정한다.
<!-- Spring -->
<spring-framework.version>5.2.8.RELEASE</spring-framework.version>

아래로 변경

<!-- Spring -->
<spring-framework.version>5.2.0.RELEASE</spring-framework.version>
이제 클래스를 만들고 사용해보자.
-context.xml (Spring Bean Configuration File)
<?xml version="1.0" encoding="UTF-8"?>
<beans xmlns="http://www.springframework.org/schema/beans"
	xmlns:xsi="http://www.w3.org/2001/XMLSchema-instance"
	xsi:schemaLocation="http://www.springframework.org/schema/beans https://www.springframework.org/schema/beans/spring-beans-4.3.xsd">

	<bean id="helloBean1" class="com.exam.spring2.HelloBean1" />

</beans>
-App.java (실행클래스)
package com.exam.spring2;

import org.springframework.context.ApplicationContext;
import org.springframework.context.support.ClassPathXmlApplicationContext;

public class App {
    public static void main( String[] args ) {
        ApplicationContext ctx =
        		new ClassPathXmlApplicationContext( "classpath:com/exam/spring2/context.xml");

        HelloBean1 helloBean1 = (HelloBean1)ctx.getBean( "helloBean1" );

        helloBean1.sayHello( "홍길동" );

      }
}
두 개의 클래스를 사용해보자.
-HelloBean1.java
package com.exam.spring1;

public class HelloBean1 {
	public HelloBean1() {
		System.out.println( "HelloBean1() 생성자 호출" );
	}

	public void sayHello( String name ) {
		System.out.println( name + " 님 안녕하세요" );
	}
}
-HelloBean2.java
package com.exam.spring1;

public class HelloBean2 {
	public HelloBean2() {
		System.out.println( "HelloBean2() 생성자 호출" );
	}

	public void sayHello( String name ) {
		System.out.println( name + " hihihi" );
	}
}
-context.xml
<?xml version="1.0" encoding="UTF-8"?>
<beans xmlns="http://www.springframework.org/schema/beans"
	xmlns:xsi="http://www.w3.org/2001/XMLSchema-instance"
	xsi:schemaLocation="http://www.springframework.org/schema/beans https://www.springframework.org/schema/beans/spring-beans-4.3.xsd">

	<bean id="helloBean1" class="com.exam.spring1.HelloBean1" />
	<bean id="helloBean2" class="com.exam.spring1.HelloBean2" />

</beans>
-App.java (실행클래스)
package com.exam.spring1;

import org.springframework.context.ApplicationContext;
import org.springframework.context.support.ClassPathXmlApplicationContext;


public class App {
    public static void main( String[] args ) {
        ApplicationContext ctx =
        		new ClassPathXmlApplicationContext( "classpath:com/exam/spring1/context.xml");

        HelloBean1 helloBean1 = (HelloBean1)ctx.getBean( "helloBean1" );
        HelloBean2 helloBean2 = (HelloBean2)ctx.getBean( "helloBean2" );

        helloBean1.sayHello( "홍길동" );
        helloBean2.sayHello( "박문수" );

      }
}

이번에는 다형성을 위해 인터페이스를 만들고 만든 인터페이스를 구현해서 사용해보자.
먼저 새로운 패키지를 만들고 그 안에 아래와 같이 인터페이스를 만든다.

-Hello.java (인터페이스)
package com.exam.spring3;

public interface Hello {
	public abstract void sayHello( String name );
}
-HelloBean1.java
package com.exam.spring3;

public class HelloBean1 implements Hello {

	public HelloBean1() {
		System.out.println( "HelloBean1 생성자 호출" );
	}

	public void sayHello(String name) {
		System.out.println( name + " 님 안녕하세요" );
	}

}
-HelloBean2.java
package com.exam.spring3;

public class HelloBean2 implements Hello {

	public HelloBean2() {
		System.out.println( "HelloBean1 생성자 호출" );
	}

	public void sayHello(String name) {
		System.out.println( name + " hello" );
	}

}
-context.xml
<?xml version="1.0" encoding="UTF-8"?>
<beans xmlns="http://www.springframework.org/schema/beans"
	xmlns:xsi="http://www.w3.org/2001/XMLSchema-instance"
	xsi:schemaLocation="http://www.springframework.org/schema/beans https://www.springframework.org/schema/beans/spring-beans-4.3.xsd">

	<bean id="helloBean1" class="com.exam.spring3.HelloBean1" />
	<bean id="helloBean2" class="com.exam.spring3.HelloBean2" />

</beans>
-App.java (실행클래스)
package com.exam.spring3;

import org.springframework.context.ApplicationContext;
import org.springframework.context.support.ClassPathXmlApplicationContext;


public class App {
    public static void main( String[] args ) {
        ApplicationContext ctx =
        		new ClassPathXmlApplicationContext( "classpath:com/exam/spring3/context.xml");

        //인터페이스 다형성을 이용한 호출
        Hello hello = null;
        hello = (Hello)ctx.getBean( "helloBean1" );
        hello.sayHello( "홍길동" );

        hello = (Hello)ctx.getBean( "helloBean2" );
        hello.sayHello( "박문수" );

      }
}

App.java에서 아래 DI 방법을 많이 사용한다.
package com.exam.spring3;

import org.springframework.context.ApplicationContext;
import org.springframework.context.support.ClassPathXmlApplicationContext;
import org.springframework.context.support.GenericXmlApplicationContext;


public class App {
    public static void main( String[] args ) {
		/*
		 * ApplicationContext ctx = new ClassPathXmlApplicationContext(
		 * "classpath:com/exam/spring3/context.xml");
		 */

    	GenericXmlApplicationContext ctx
    		= new GenericXmlApplicationContext( "classpath:com/exam/spring3/context.xml" );

        //인터페이스 다형성을 이용한 호출
        Hello hello = null;
        hello = (Hello)ctx.getBean( "helloBean1" );
        hello.sayHello( "홍길동" );

        hello = (Hello)ctx.getBean( "helloBean2" );
        hello.sayHello( "박문수" );

        //수동으로 종료를 시켜줘야 한다.
        ctx.close();

      }
}
객체 생성시 다음과 같은 방법으로 나뉜다.
- 프로토타입(prototype)이란 필요할 때마다 객체변수를 계속 만들어가는 것
- 싱글톤(singleton)이란 하나의 한 번 만들어진 객체를 지속적으로 사용하는 것
싱글톤에서는 static을 사용
기존 패키지를 복사해서 com.exam.spring4를 만들자.
-context.xml
<?xml version="1.0" encoding="UTF-8"?>
<beans xmlns="http://www.springframework.org/schema/beans"
	xmlns:xsi="http://www.w3.org/2001/XMLSchema-instance"
	xsi:schemaLocation="http://www.springframework.org/schema/beans https://www.springframework.org/schema/beans/spring-beans-4.3.xsd">

	<bean id="helloBean1" class="com.exam.spring4.HelloBean1" scope="singleton"/>
	<bean id="helloBean2" class="com.exam.spring4.HelloBean1" scope="prototype"/>

</beans>
-App.java
package com.exam.spring4;

import org.springframework.context.ApplicationContext;
import org.springframework.context.support.ClassPathXmlApplicationContext;
import org.springframework.context.support.GenericXmlApplicationContext;

/**
 * Hello world!
 *
 */
public class App {
    public static void main( String[] args ) {
		/*
		 * ApplicationContext ctx = new ClassPathXmlApplicationContext(
		 * "classpath:com/exam/spring2/context.xml");
		 */
    	GenericXmlApplicationContext ctx =
    			new GenericXmlApplicationContext( "classpath:com/exam/spring4/context.xml" );

    	//singleton 방식으로 객체 만들기 : 하나 만들어서 지속 사용
        HelloBean1 helloBean11 = (HelloBean1)ctx.getBean( "helloBean1" );
        HelloBean1 helloBean12 = (HelloBean1)ctx.getBean( "helloBean1" );

        System.out.println( "helloBean11 : " + helloBean11 );
        System.out.println( "helloBean12 : " + helloBean12 );

        //prototype 방식으로 객체 만들기 : 필요할 때마다 계속 생성
        HelloBean1 helloBean21 = (HelloBean1)ctx.getBean( "helloBean2" );
        HelloBean1 helloBean22 = (HelloBean1)ctx.getBean( "helloBean2" );

        System.out.println( "helloBean21 : " + helloBean21 );
        System.out.println( "helloBean22 : " + helloBean22 );

        ctx.close();

      }
}
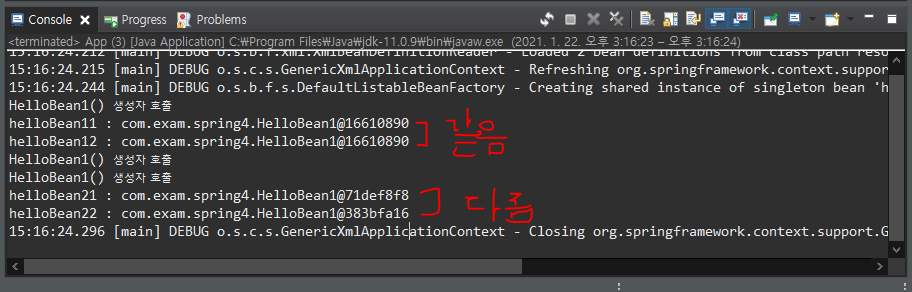
실행결과를 보면 singleton일 경우 객체의 주소값이 같으면서 생성자가 한 번만 호출되는 반면에
prototype인 경우 객체의 주소값이 다르고 생성자도 두 번 호출됨으로 다른 객체가 만들어진 것을 알 수 있다.
객체생성의 초기값은 싱글톤이다.
만약 디폴트 생성자가 아닐 경우 객체를 생성하는 법을 알아보자.
즉, 오버로딩된 생성자일 경우 객체를 만들어보자.
새로운 Maven 프로젝트를 만들고 pom.xml에 다음과 같이 spring 라이브러리르 추가한다.
-pom.xml
<project xmlns="http://maven.apache.org/POM/4.0.0" xmlns:xsi="http://www.w3.org/2001/XMLSchema-instance"
  xsi:schemaLocation="http://maven.apache.org/POM/4.0.0 http://maven.apache.org/xsd/maven-4.0.0.xsd">
	<modelVersion>4.0.0</modelVersion>

	<groupId>com.exam</groupId>
	<artifactId>spring1</artifactId>
	<version>0.0.1-SNAPSHOT</version>
	<packaging>jar</packaging>

	<name>spring1</name>
	<url>http://maven.apache.org</url>

	<properties>

		<!-- Generic properties -->
		<java.version>1.8</java.version>
		<project.build.sourceEncoding>UTF-8</project.build.sourceEncoding>
		<project.reporting.outputEncoding>UTF-8</project.reporting.outputEncoding>

		<!-- Spring -->
		<spring-framework.version>5.2.8.RELEASE</spring-framework.version>

		<!-- Hibernate / JPA -->
		<hibernate.version>4.2.1.Final</hibernate.version>

		<!-- Logging -->
		<logback.version>1.0.13</logback.version>
		<slf4j.version>1.7.5</slf4j.version>

		<!-- Test -->
		<junit.version>4.11</junit.version>
	</properties>

	<dependencies>
		<!-- Spring and Transactions -->
		<dependency>
			<groupId>org.springframework</groupId>
			<artifactId>spring-context</artifactId>
			<version>${spring-framework.version}</version>
		</dependency>
		<dependency>
			<groupId>org.springframework</groupId>
			<artifactId>spring-tx</artifactId>
			<version>${spring-framework.version}</version>
		</dependency>

		<!-- Logging with SLF4J & LogBack -->
		<dependency>
			<groupId>org.slf4j</groupId>
			<artifactId>slf4j-api</artifactId>
			<version>${slf4j.version}</version>
			<scope>compile</scope>
		</dependency>
		<dependency>
			<groupId>ch.qos.logback</groupId>
			<artifactId>logback-classic</artifactId>
			<version>${logback.version}</version>
			<scope>runtime</scope>
		</dependency>

		<!-- Hibernate -->
		<dependency>
			<groupId>org.hibernate</groupId>
			<artifactId>hibernate-entitymanager</artifactId>
			<version>${hibernate.version}</version>
		</dependency>

		<!-- Test Artifacts -->
		<dependency>
			<groupId>org.springframework</groupId>
			<artifactId>spring-test</artifactId>
			<version>${spring-framework.version}</version>
			<scope>test</scope>
		</dependency>
		<dependency>
			<groupId>junit</groupId>
			<artifactId>junit</artifactId>
			<version>${junit.version}</version>
			<scope>test</scope>
		</dependency>

	</dependencies>
</project>
하나의 클래스를 만들고 생성자를 2개 만들자.
-HelloBean.java
package com.exam.spring1;

public class HelloBean {
	private String name;

	public HelloBean() {
		System.out.println( "디폴트생성자 : HelloBean 생성자 호출" );
		this.name = "홍길동";
	}
	public HelloBean( String name ) {
		System.out.println( "오버로딩생성자 : HelloBean(String name) 생성자 호출" );
		this.name = name;
	}

	public void sayHello() {
		System.out.println( name + " 님 안녕하세요" );
	}
}
Spring Bean Configuration File인 context.xml을 만든다. 그리고 이때 디폴트 생성자와 오버로딩된 생성자로 객체가 만들어지도록 아래와 같이 작성한다.
오버로딩된 생성자로 객체를 설정할 경우 consructor-arg와 value태그를 이용해서 오버로딩된 생성자가 필요로하는 매개변수를 넘겨준다.
-context.xml
<?xml version="1.0" encoding="UTF-8"?>
<beans xmlns="http://www.springframework.org/schema/beans"
	xmlns:xsi="http://www.w3.org/2001/XMLSchema-instance"
	xsi:schemaLocation="http://www.springframework.org/schema/beans https://www.springframework.org/schema/beans/spring-beans-4.3.xsd">

	<!-- 디폴트 생성자로 만드는 객체  -->
	<bean id="helloBean1" class="com.exam.spring1.HelloBean" scope="prototype" />

	<!-- 오버로딩된 생성자로 만드는 객체  -->
	<bean id="helloBean2" class="com.exam.spring1.HelloBean" scope="prototype" >
		<constructor-arg>
			<value>박문수</value>
		</constructor-arg>
	</bean>

</beans>
-App.java (실행클래스)
package com.exam.spring1;

import org.springframework.context.support.GenericXmlApplicationContext;

public class App {
    public static void main( String[] args ) {
        GenericXmlApplicationContext ctx =
        		new GenericXmlApplicationContext( "classpath:com/exam/spring1/context.xml" );

        //디폴트 생성자로 만들어진 객체 사용
        HelloBean helloBean1 = (HelloBean)ctx.getBean( "helloBean1" );
        helloBean1.sayHello();

        //오버로딩된 생성자로 만들어진 객체 사용
        HelloBean helloBean2 = (HelloBean)ctx.getBean( "helloBean2" );
        helloBean2.sayHello();

    }
}
context.xml의 consrouctor태그를 간단하게 작성해보자.
<?xml version="1.0" encoding="UTF-8"?>
<beans xmlns="http://www.springframework.org/schema/beans"
	xmlns:xsi="http://www.w3.org/2001/XMLSchema-instance"
	xsi:schemaLocation="http://www.springframework.org/schema/beans https://www.springframework.org/schema/beans/spring-beans-4.3.xsd">

	<!-- 디폴트 생성자로 만드는 객체  -->
	<bean id="helloBean1" class="com.exam.spring1.HelloBean" scope="prototype" />

	<!-- 오버로딩된 생성자로 만드는 객체  -->
<!-- 	<bean id="helloBean2" class="com.exam.spring1.HelloBean" scope="prototype" >
		<constructor-arg>
			<value>박문수</value>
		</constructor-arg>
	</bean> -->

	<bean id="helloBean2" class="com.exam.spring1.HelloBean" scope="prototype" >
		<constructor-arg value="박문수" />
	</bean>

</beans>
만약 생성자의 매개변수가 여러개일 때는 아래와 같이 <constructor-arg>를 여러번 써줘야한다.
-context.xml
<?xml version="1.0" encoding="UTF-8"?>
<beans xmlns="http://www.springframework.org/schema/beans"
	xmlns:xsi="http://www.w3.org/2001/XMLSchema-instance"
	xsi:schemaLocation="http://www.springframework.org/schema/beans https://www.springframework.org/schema/beans/spring-beans-4.3.xsd">

	<!-- 디폴트 생성자로 만드는 객체  -->
	<bean id="helloBean1" class="com.exam.spring1.HelloBean" scope="prototype" />

	<!-- 오버로딩된 생성자로 만드는 객체  -->
	<bean id="helloBean2" class="com.exam.spring1.HelloBean" scope="prototype" >
		<constructor-arg>
			<value>박문수</value>
		</constructor-arg>
	</bean>

	<!-- 오버로딩된 생성자가 매개변수가 여러개일 때 만드는 객체  -->
	<bean id="helloBean3" class="com.exam.spring1.HelloBean" scope="prototype" >
		<constructor-arg>
			<value>문수</value>
		</constructor-arg>
		<constructor-arg>
			<value>박</value>
		</constructor-arg>
	</bean>

	<!--
 	<bean id="helloBean2" class="com.exam.spring1.HelloBean" scope="prototype" >
		<constructor-arg value="박문수" />
	</bean>
	 -->

</beans>
-App.java
package com.exam.spring1;

import org.springframework.context.support.GenericXmlApplicationContext;

public class App {
    public static void main( String[] args ) {
        GenericXmlApplicationContext ctx =
        		new GenericXmlApplicationContext( "classpath:com/exam/spring1/context.xml" );

        //디폴트 생성자로 만들어진 객체 사용
        HelloBean helloBean1 = (HelloBean)ctx.getBean( "helloBean1" );
        helloBean1.sayHello();

        //오버로딩된 생성자로 만들어진 객체 사용
        HelloBean helloBean2 = (HelloBean)ctx.getBean( "helloBean2" );
        helloBean2.sayHello();

        //오버로딩된 생성자가 매개변수가 여러개일때 객체 사용
        HelloBean helloBean3 = (HelloBean)ctx.getBean( "helloBean3" );
        helloBean3.sayHello();

    }
}

이를 context.xml에서 간단하게 사용하려면 아래와 같이 쓴다.
 <bean id="helloBean3" class="com.exam.spring1.HelloBean" scope="prototype" >
	<constructor-arg value="문수" />
	<constructor-arg value="박" />
</bean>
또한 생성자 매개변수에 순서를 줄 수 있다.
<bean id="helloBean3" class="com.exam.spring1.HelloBean" scope="prototype" >
	<constructor-arg value="문수" index="1"/>
	<constructor-arg value="박" index="0"/>
</bean>
사용자 정의 클래스를 생성자로 호출해서 사용하기
이번에는 사용자 정의 클래스를 생성자로 호출해서 사용해보자.
-BoardTO.java (사용자정의 클래스)
package com.exam.spring3;

public class BoardTO {

	public BoardTO() {
		System.out.println( "BoardTO() 생성자 호출" );
	}

}
-WriteAction.java (실행클래스에서 가져다쓸 객체클래스)
package com.exam.spring3;

public class WriteAction {
	private BoardTO to;

	public WriteAction() {
		System.out.println( "WriteAction() 호출" );
	}
	//사용자 정의 클래스를 생성자로 부르기
	public WriteAction( BoardTO to ) {
		System.out.println( "WriteAction( BoardTO to ) 호출" );
		this.to = to;
	}

	public void execute() {
		System.out.println( "실행 메서드 호출" );
	}
}
-context.xml
<?xml version="1.0" encoding="UTF-8"?>
<beans xmlns="http://www.springframework.org/schema/beans"
	xmlns:xsi="http://www.w3.org/2001/XMLSchema-instance"
	xsi:schemaLocation="http://www.springframework.org/schema/beans https://www.springframework.org/schema/beans/spring-beans-4.3.xsd">

	<bean id="action1" class="com.exam.spring3.WriteAction" scope="prototype" />

	<!-- 사용자정의   -->
	<bean id="action2" class="com.exam.spring3.WriteAction" scope="prototype" >
		<constructor-arg>
			<bean class="com.exam.spring3.BoardTO" />
		</constructor-arg>
	</bean>

	<!-- 사용자정의클래스에 id값을 주고 그 id값으로 객체를 설정하기  -->
	<bean id="to" class="com.exam.spring3.BoardTO" />
	<bean id="action3" class="com.exam.spring3.WriteAction" scope="prototype" >
		<constructor-arg>
			<ref bean="to" />
		</constructor-arg>
	</bean>
</beans>
-App.java (실행클래스)
package com.exam.spring3;

import org.springframework.context.support.GenericXmlApplicationContext;

public class App {
    public static void main( String[] args ) {
        GenericXmlApplicationContext ctx =
        		new GenericXmlApplicationContext( "classpath:com/exam/spring3/context.xml" );

        WriteAction action1 = (WriteAction)ctx.getBean( "action1" );
        action1.execute();

        //사용자 정의 클래스 객체 가져오기
        WriteAction action2 = (WriteAction)ctx.getBean( "action2" );
        action2.execute();

        //사용자 정의 클래스 객체 가져오기
        WriteAction action3 = (WriteAction)ctx.getBean( "action3" );
        action3.execute();

        ctx.close();
    }
}

Setter와 Getter를 이용해서 데이터 초기화
새로운 메이븐 프로젝트를 만들고 fom.xml 내용을 다른 프로젝트에서 복사해서 spring라이브러리를 다운받는다.
-BoardTO.java
package com.exam.spring3;

public class BoardTO {
	private int seq;
	private String subject;

	public int getSeq() {
		return seq;
	}
	public String getSubject() {
		return subject;
	}

	public void setSeq(int seq) {
		this.seq = seq;
	}
	public void setSubject(String subject) {
		this.subject = subject;
	}
}
-context.xml (spring bean configuration file)
<?xml version="1.0" encoding="UTF-8"?>
<beans xmlns="http://www.springframework.org/schema/beans"
	xmlns:xsi="http://www.w3.org/2001/XMLSchema-instance"
	xsi:schemaLocation="http://www.springframework.org/schema/beans https://www.springframework.org/schema/beans/spring-beans-4.3.xsd">


	<bean id="to" class="com.exam.spring3.BoardTO" scope="prototype">
		<property name="seq" value="1" />
		<property name="subject" value="제목1" />
	</bean>

</beans>
-App2.java (실행클래스)
package com.exam.spring3;

import org.springframework.context.support.GenericXmlApplicationContext;

public class App2 {

	public static void main(String[] args) {
		GenericXmlApplicationContext ctx =
				new GenericXmlApplicationContext( "classpath:com/exam/spring3/context.xml");

		BoardTO to = (BoardTO)ctx.getBean( "to" );
		System.out.println( to.getSeq() );
		System.out.println( to.getSubject() );

		ctx.close();
	}
}

실습) 아래 형식을 Spring DI 형태로 변경해서 같은 결과가 나오도록 출력하기
-App.java
package com.exam.spring4;

public class App {

	public static void main(String[] args) {

		//여기서부터
		BoardTO to = new BoardTO();
		to.setSeq( 1 );
		to.setSubject( "제목" );

		WriteAction action = new WriteAction();
		action.setTo(to);

		action.execute();

		//여기까지 spring DI형태로 변경하기
	}
}
ㅡㅡㅡㅡㅡㅡㅡㅡㅡㅡㅡㅡㅡㅡㅡㅡㅡㅡㅡㅡㅡㅡㅡㅡㅡㅡㅡ
1
제목
코드
-BoardTO.java
package com.exam.spring4;

public class BoardTO {
	private int seq;
	private String subject;

	public BoardTO() {
		System.out.println( "BoardTO() 생성자 호출" );
	}
	public int getSeq() {
		return seq;
	}
	public String getSubject() {
		return subject;
	}

	public void setSeq(int seq) {
		this.seq = seq;
	}
	public void setSubject(String subject) {
		this.subject = subject;
	}
}
-WriteAction.java
package com.exam.spring4;

public class WriteAction {
	private BoardTO to;

	public WriteAction( BoardTO to ) {
		System.out.println( "WriteAction( BoardTO to ) 생성자 호출" );
		this.to = to;
	}

	public BoardTO getTo() {
		return to;
	}
	public void setTo( BoardTO to ) {
		this.to = to;
	}
	public void execute() {
		System.out.println( to.getSeq() );
		System.out.println( to.getSubject() );
	}
}
-context.xml (spring configuration file)
<?xml version="1.0" encoding="UTF-8"?>
<beans xmlns="http://www.springframework.org/schema/beans"
	xmlns:xsi="http://www.w3.org/2001/XMLSchema-instance"
	xsi:schemaLocation="http://www.springframework.org/schema/beans https://www.springframework.org/schema/beans/spring-beans-4.3.xsd">

	<bean id="to" class="com.exam.spring4.BoardTO" scope="prototype">
		<property name="seq" value="1" />
		<property name="subject" value="제목" />
	</bean>

	<bean id="action" class="com.exam.spring4.WriteAction" scope="prototype">
		<constructor-arg>
			<ref bean="to"/>
		</constructor-arg>
	</bean>

</beans>
-App.java (실행클래스)
package com.exam.spring4;

import org.springframework.context.support.GenericXmlApplicationContext;

public class App {

	public static void main(String[] args) {
		GenericXmlApplicationContext ctx =
				new GenericXmlApplicationContext( "classpath:com/exam/spring4/context.xml" );

		WriteAction action = (WriteAction)ctx.getBean( "action" );
		BoardTO to = action.getTo();

		System.out.println( to.getSeq() );
		System.out.println( to.getSubject() );

	}
}


